The traditional way to offer a download is to simply upload the file to the web host by using the Add Media button and then placing a plain and boring link in the article. Some may even go one step further and offer a big “Download now” button pointed to that link. However, this strategy has many problems as you would not be able to track the number of downloads of your files, nor you would be able to password protect your files. That’s why in this article, you will be able to learn how to manage and track file downloads in WordPress by using a free plugin.
Why track downloads in WordPress?
Let’s say you’re a graphic designer and want to offer free icons or wallpapers to your blog’s loyal readers. If you’re not tracking your file downloads, then you would not be able to know which file is downloaded more, and which file interests more to your visitors. If for example, icons are downloaded more, then from next time, you can focus more on creating icons and not on wallpapers. You can also have a download counter for visitors, so that they can know which work of yours is more popular than other.
How to manage and control file downloads in WordPress
For this task, we will be using the WordPress Download Manager plugin, which can be downloaded from here. This plugin will help you to manage, track and control file downloads from your WordPress site. You can set password to certain files to protect your downloads, and also set access level any of your downloadable files from the options. To add/embed downloadable files to your posts or pages, you simply need to copy and paste the shortcode to your post or page.
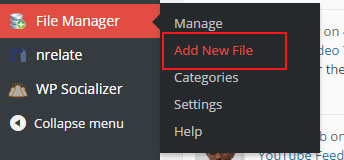
To get started, install the plugin and then you will be able to see a new menu. Go to File Manager > Add New File to add a new file.
From here, you will need to fill out the details such as title, description (not necessary though), and other package settings.
From Package settings section, you can change the link label, add a password to your file, limit the number of downloads, show/hide download counter to visitor and configure access level.

You can also select an icon that will be displayed alongside the download link. To upload your file, simply drag and drop the file to “Upload file from PC” area.
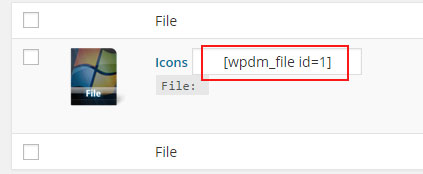
Finally when you’re done configuring all the settings, hit the “Create Package” button. Now, go to File Manager > Manage and copy the shortcode from there, and paste it in any of your posts or pages where you want to offer this downloadable product (file).
On the frontend, you will now be able to see the download link along with the icon that you selected.
To track how many times your visitors have downloaded this file, you can go to File Manager > Manage and refer the “Downloads” column.
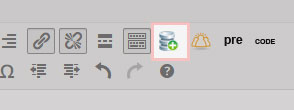
Another way to use this plugin is by going to the Add New post and clicking on the new button that is added by this plugin.
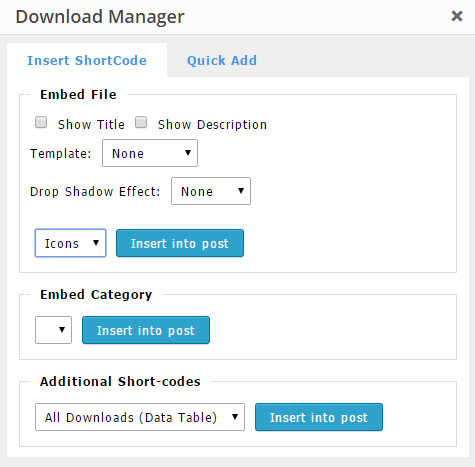
From here, you can choose whether you want to show title and description or not, change the drop shadow effect, which file to embed and such settings. The “Quick Add” tab will also allow you to quickly add a downloadable file. When you are done filling out all the details, click on the “Insert into post” button.
So that’s how you can offer and track downloads in WordPress. There are many plugins for this purpose but the plugin mentioned in this article is easy to use and it just works. If you’ve got any other better suggestion or any queries then let me know in the comments below.
Also read: 5 Best WordPress Plugins for Selling Digital Products