WordPress 3.5 introduced to us an entirely new and revamped Media uploader. The new version just made creating image galleries easier and now you can create a gallery using specific selecting images. Apart from that, the Media Library section now has more room to display all previously uploaded media. While all this works great, there’s one annoying problem that the new Media uploader comes with – when you enter Title for your image and publish your post/page, you will notice that the Title tag is indeed not inserted into the image.
Don’t worry, this is not a bug but WordPress 3.5 has removed the option to display Title tag in images. Here’s what nacin has to say:
We made a choice, and this choice on the whole benefits all users and readers, not just those using screenreaders. How often have you moused over an image on a WordPress site and saw “IMG_1234”? One of the lamest things ever. Never again.
Now let’s take a look at the solution. There are two ways to add Title tag in pictures/images in WordPress 3.5.
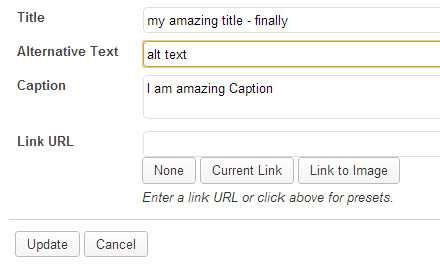
1) After inserting the image in your post or page, in the Visual tab, click on the image and then on Edit Image button.

In the Title field, type a Title for your image and then click on the Update button. This Title tag will be finally added to your image.
2) The above task is time consuming and requires more effort. If you have more images in your post, then you’ll be doing this for every image. As always, here’s Restore Image Title plugin that adds the title field to your images by using the Title text that you have entered while uploading images. There’s no need to configure any options. All you need to do is to install and activate the plugin, that’s it. From now on wards, any image that you add to your visual editor will have the Title tag inserted by default.
Use any one of the above two methods to insert Title tag in your post.